


Description
I have always loved learning how common mechanisms we experience in daily life actually work. One of the mechanisms that always amazed me was the simple combination lock. Why do you need to turn one way to the first number, make a full rotation the opposite way to the second number, and then turn directly to the third number? The best way to fully understand this mechanism was to make one!
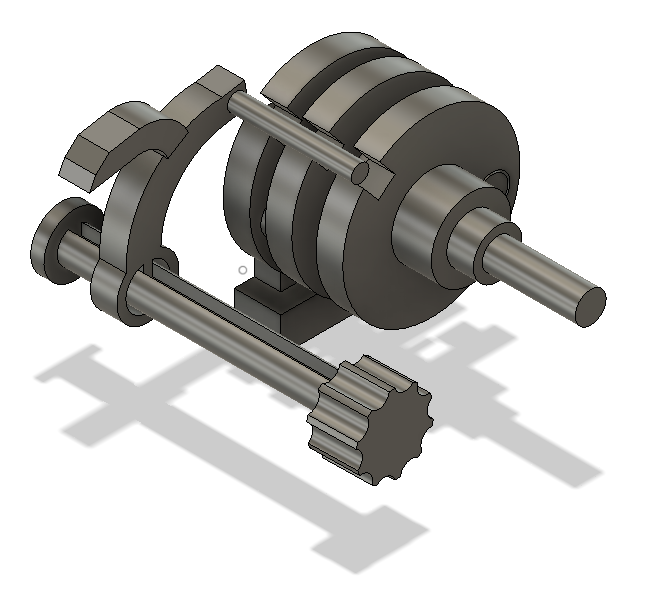
I started by researching the mechanism and was surprised to find how clever and simple the base design is. I assumed that it was something complex that requires the unintuitive unlocking pattern, but actually it is the simplicity that happens to require this. The mechanism is just three disks aligned face to face with the first connected directly to the dial and the others turned as pins protruding out of the disks push each other. Each disk has a notch in its side, and when these notches are aligned, a bar can fall into them and release the shackle, opening the lock. The turning pattern of the unlocking allows each disk to be set through the interactions of the pins.
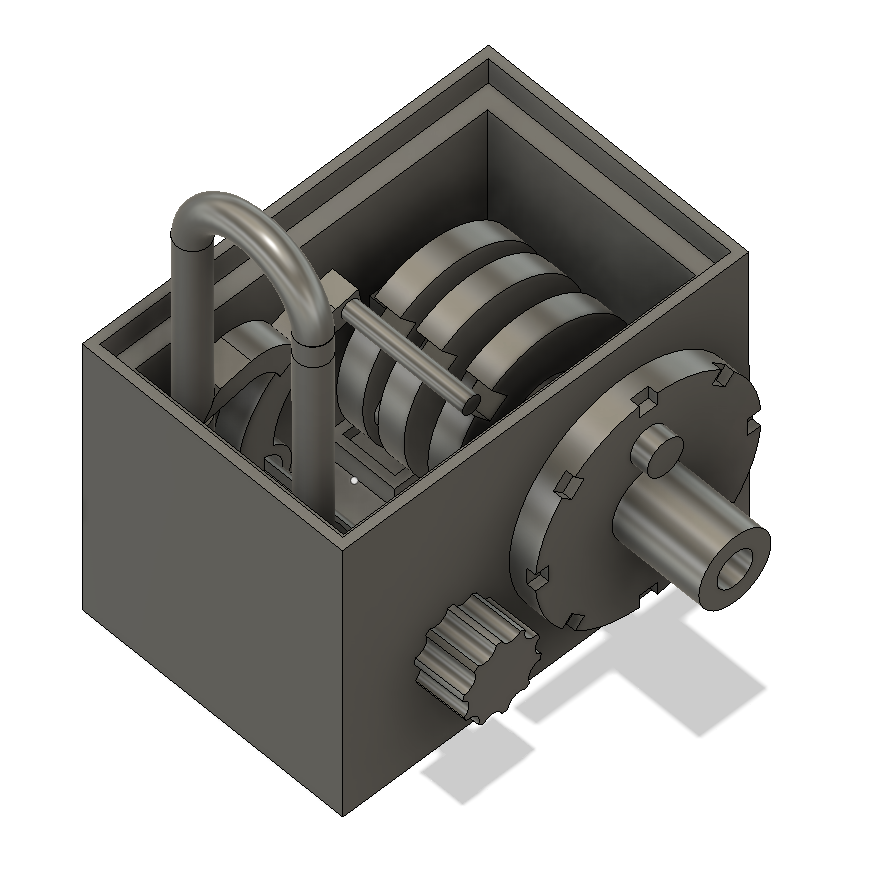
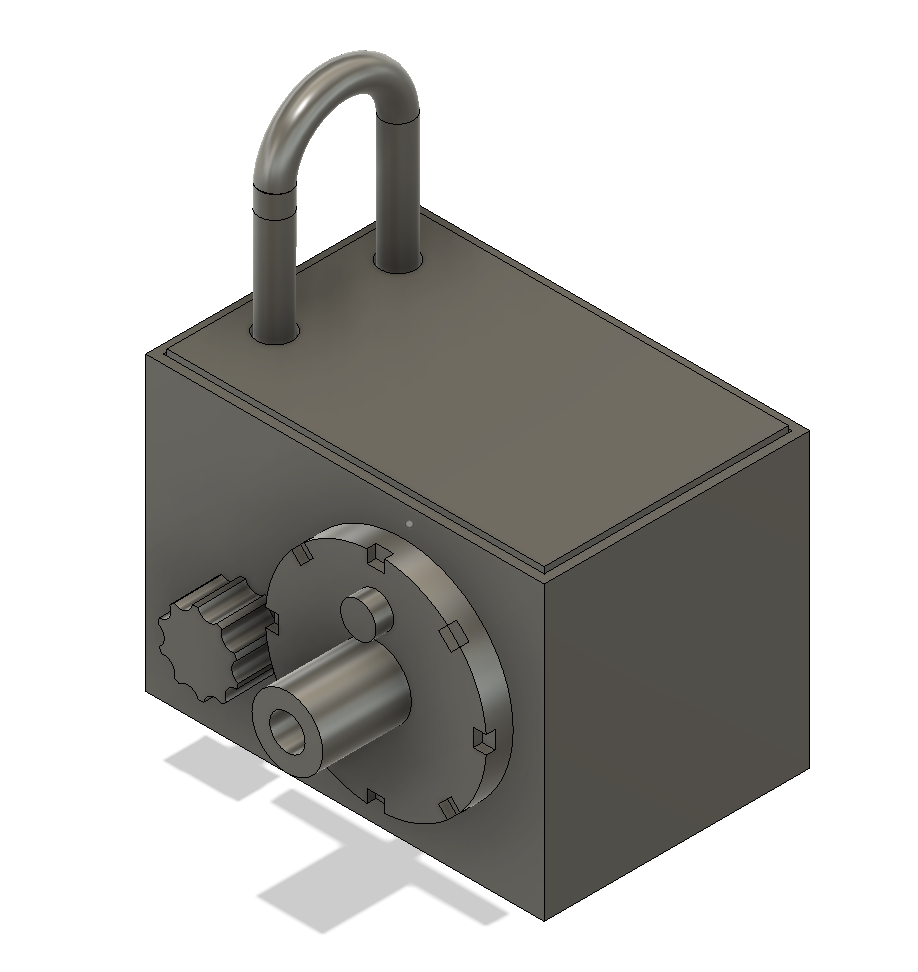
I modeled my first prototype in Autodesk Fusion 360, and I printed it on my LulzBot Mini 3D printer. I was better at tolerances and general design practices at this point, so it only took me a couple of prints before I had a working model. I didn’t seal the lock, so you can still see the mechanism inside by lifting off the top. It is interesting to watch! I can also peek at the disks inside when I forget what I set for the combination.
